


About a year ago, I built my own RetroPie, a Raspberry Pi retro gaming machine that runs just about every video game published more than 10 years ago. Perhaps you’d like to build your own?
Here is how I built mine. I use it to run games from the Arcade (MAME), Commodore 64, Famicom and Famicom Disk System, Game Gear, Game Boy (+ Color, Advance), Neo Geo, NES, PC Engine (+ CD), Sega Genesis/MegaDrive (+ CD, 32X), Sega Master System, SNES, and Vectrex. But it supports many more.
Required hardware:
I recommend buying Pi components from The Pi Hut, as they guarantee compatibility and support education in the UK, but I purchased most of this from Amazon.
- Raspberry Pi 3 Model B.
- 3A micro-USB PSU (required for Pi 3 under load, your 2.5A phone charger won’t cut it).
- 64GB micro SD card for the DrMaxwell image I recommend below. Could go larger.
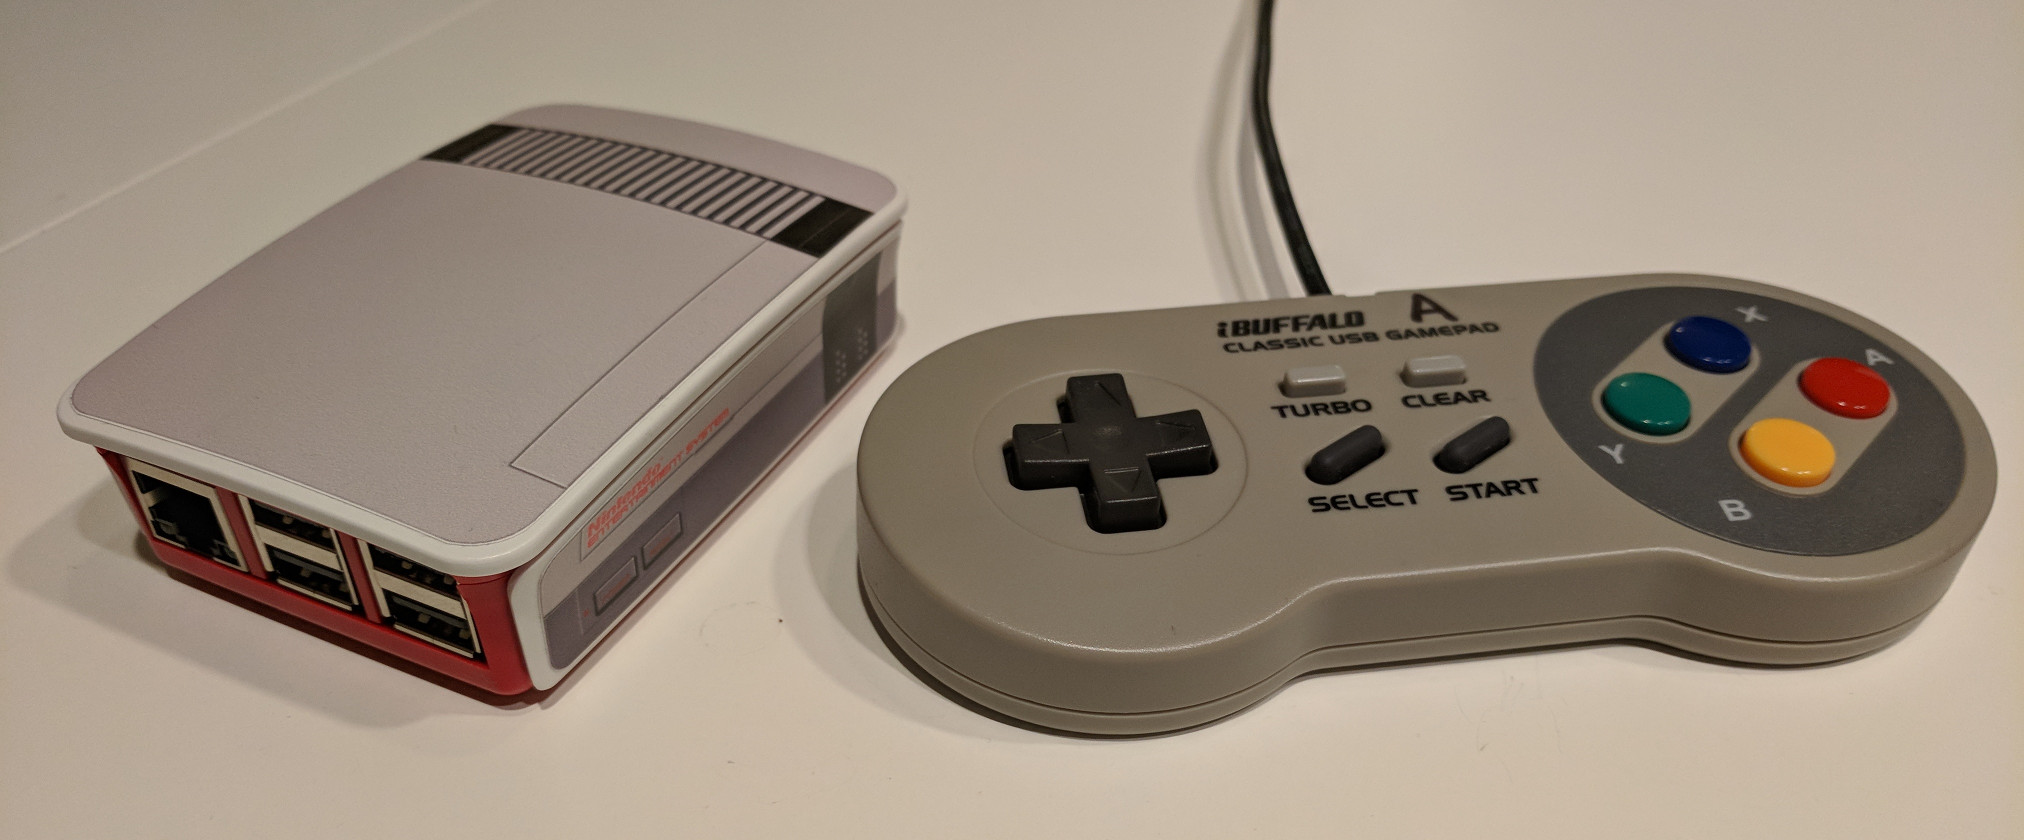
- Official Raspberry Pi 3 Case – White/Red, Black/Grey.
- 4x Buffalo Classic USB SNES-style gamepads – bluetooth will add noticeable latency on the Pi, so stick with wired.
I chose the above controllers because I was mostly interested in games from the NES and SNES era, and others with digital controls. If you’re interested in Nintendo 64 or other systems with analog sticks, there are many choices to choose from.
Optional hardware:
- NES skin for Raspberry Pi official case. Get the medium size.
- Heat sinks for Raspberry Pi – Possibly unnecessary.
- Targus 4-por USB hub – ensures controllers have dedicated ports. You can number these ports and the controller plugged in there will be player 1, 2, etc. If you use the Pi’s ports directly, controllers are assigned in order of bus assignment (the order you plug them in, but not always).
- Desktop USB 2.0 extension – Weighted, so you can put this on your coffee table and plug in controllers there, while Pi is under the TV.
- Any HDMI cable. I like these thin ones.
- Any USB keyboard, for setup only.
Software (pick one):
- Retropie image, and find your own ROMs (register an account on the forum to get links to Mega). This is what I did, but spent a lot of time renaming, moving system BIOS ROMs into the right place for emulators, etc. The retropie wiki answers all your questions.
- Download the 64GB DrMaxwell image here, with ROMs and ready to go. This one is popular with forum members and is probably less effort than what I did.
Costs:
| Raspberry Pi 3 Model B with power supply, case, and 64GB micro SD card |
£70 |
| SNES-style gamepads | £18 each, or £72 for a set of four |
| Cables, 4-port USB hub, heat sinks, stickers | £30 |
| Total | £172 |
You could easily go for a minimal single-player build for £90 brand new, or even cheaper if you have a Pi and micro-SD card lying around.
Build:
Assembly is easy. The case snaps together, the stickers go on easily, cables are plug and play. Experiment with the USB hub to identify which is port 1, 2, 3, or 4, and label them. Label your controllers A, B, C, or D on each end to make tracing cables easy. Remember that controller 1 is only controller 1 if it’s in port 1.
Write the SD card image to the micro SD card, and boot up. Almost all questions are answered in the RetroPie docs, but you should definitely configure your controllers, and choose some shaders to give your games that CRT feel. LCDs are too sharp for retro gaming.
Happy Gaming!
Tags: emulation, hardware, raspberrypi
No comments
Comments feed for this article
Trackback link: https://www.tolaris.com/2017/10/25/retropie-all-your-classic-video-games-in-one-tiny-box/trackback/